
Tip of the Week: Using Excel to Excel-lerate
Microsoft Excel has been around for quite some time, but it’s one of the trickier Microsoft Office solutions to master. You might know all about some of the more common Excel tricks, but do you know these power shortcuts that can help you fully take advantage of the spreadsheet software? Here are some obscure Excel shortcuts that your organization can take advantage of.
However, before we jump into any new keyboard shortcuts, we want to remind you that all of the basic keyboard shortcuts that work in other Microsoft products will still work here. All of the tried and true shortcuts like Copy, Cut, Paste, and Find, will all work here in Excel.
Check Specific Formulas
Excel doesn’t default to showing you the formulas in your cells. Instead, all it will show you is the result of the formula. If you click on a cell, the formula will appear in the formula bar at the top of the spreadsheet. Doing this for each and every one of your cells can be troublesome and time-consuming. You can toggle your spreadsheet between values and formulas by using the Ctrl + ` keyboard shortcut.
Border Your Cells
If you don’t want to waste a bunch of time by finding specific borders for your cells, you can use the default one by pressing the keyboard shortcut for Ctrl + Shift + 7. This surrounds the cells you’ve selected with a simple border.
Remove Cell Borders
To quickly remove borders from your cells, you can use the keyboard shortcut for Ctrl + – (minus). It’s a quick solution to fix borders that didn’t turn out the way you wanted them to.
Select an Entire Row or Column
You can select an entire row by clicking the first cell in the row and using the Shift + Spacebar shortcut. The same function for columns can be accomplished by using the Ctrl + Spacebar shortcut.
Format an Object or Chart
If you’ve inserted an object or chart into your spreadsheet, Excel makes it easy to format it. You can use the keyboard shortcut to bring up a dialogue box that contains all of the proper formatting tools you’ll need to succeed. The shortcut is Ctrl + 1.
What are some of your favorite Microsoft Excel shortcuts? Leave them in the comments.
Tip of the Week: The Basics of Data Backup

Data backup and disaster recovery are two of the linchpins of any business that relies on data and IT solutions storing information. Your business needs to have a plan for when operations are interrupted due to an unforeseeable data loss event. There are a few ways that you can keep your data backups as safe and efficient as possible.
Here are some of the basic conditions that you should attempt to reach for your business’s data backups.
Ensure Quality Backup Security and Safety
It’s important to view your data backup system as more than just an elaborate insurance policy for your business’s operations. The reality of the situation is that your data is arguably the most important part of your organization, as without it, you can forget about resuming business as usual. Therefore, it’s important that you keep your data as secure as possible from both cyber and physical threats, including hackers, natural disasters, and so on. Imagine that your data is safe and secure on-site, only to have it be destroyed by a flood or fire. Cloud-based backup avoid these issues by storing it online in a secure environment, away from entities that could cause it harm.
Keep a Disaster Recovery Strategy
Would your business be out of commission for a long time following a disaster scenario? Even if you have a data backup secure off-site, this means nothing if you don’t have a strategy to implement it as soon as possible. A disaster recovery strategy is of the utmost importance. By considering all of the details about a potential disaster recovery scenario, you can better prepare for situations where you’ll need to initiate it. This means that you can minimize data loss and time wasted due to downtime.
Test Your Backups Regularly
You’ll only benefit from your business’s backup and disaster recovery if it works as intended. Imagine that you experience a scenario where you need to deploy a data backup, but it’s corrupted and you can’t initiate it. This can really put a damper on your plans. You should periodically test your business’s backups to ensure that they actually work when you need them to.
Don’t wait until the last minute to prepare your business for a disaster scenario. To learn more, reach out to us at (317) 705-0333.
Tip of the Week: Gmail Is Made Even Easier When You Use Filters
![]()
Your email inbox can quickly become an overwhelming mess without the proper management, but who has the time to sort through their email inbox on top of all of their other, more urgent responsibilities? Fortunately for Gmail users, the program provides the answer with its filter feature. For this week’s tip, we’ll show you how to regain control of your inbox with filters.
First, look to Gmail’s search bar at the top of the window and click the down arrow it has on its right side. A drop down will appear with numerous fields, allowing you to narrow your search. These fields include:
- From, or the sender of the message
- To, or the recipient of the message
- Subject
- Has the words
- Doesn’t have
These fields end with checkboxes allowing you to include messages with attachments in your search, and the ability to omit chat messages. You can also search based on message size and the date received.
Once these fields are filled out, you’ll be given the option to Create filter with this search, from which you can further customize the filter with more options. Once you’ve finished, click Create Filter.
You can also use a specific message to create a filter. Use the checkbox to identify the message that will inform the filter and click the More button that is above the message. You’ll be given the option to Filter messages like these and a few additional properties to assign to the filter.
If you need to return to a filter to edit it, access Settings via the gear icon in the right corner of the window to find Filters and Blocked Addresses. Out of the list of every filter you’ve created, select the one you’re ready to edit and make your changes, or delete the filter outright.
How likely is it that you’ll start to use these filters? Let us know in the comments, and make sure you subscribe to this blog for more tips!
Tip of the Week: Your Mouse Can Do a Lot With a Click or Two

You might think you know all of the tricks that a mouse is capable of, but you would be wrong. Here are some of the niftiest uses possible for your mouse.
Highlighting Text
You can highlight any text by clicking and dragging your mouse over it. However, if you don’t want to do this, you can just click on a word at the beginning of the text that you want to copy, hold down Shift, and click where you want the highlight to end. All of the text between the two points will be highlighted–just like it would be if you held your mouse button down and dragged it across the text.
Take Advantage of Your Scrolling Wheel
If you’ve ever tried to press down on the mouse wheel, you can close an open tab in your web browser. By holding down the Ctrl key and scrolling up or down with the wheel, you can zoom in or out of the screen. You can also hold down the Shift key and scroll down to open up a closed tab.
Use Double and Triple Clicks
If you want to select a specific word, you can double-click it with your mouse. You can also triple-click it to select the entire body of text in the paragraph. If you double-click and drag your mouse, it will highlight one word at a time so as best to cater to your specific needs.
Select Multiple Choices in Drop-down Menus
If you’re filling out a drop-down menu where multiple options are viable choices for you, you can select multiple options by holding down the Ctrl key and clicking each of them individually.
Use the Side Buttons
Some mouses come installed with buttons on the side. These can be used to go back and forth to previously visited pages on your web browser. Depending on the model, you can also program the buttons so that they can be customized.
What are some mouse tips that you can think of? Let us know in the comments.
Tip of the Week: It’s Easy to Color-Code Your Google Drive
By default, folders in Google Drive display as a muted gray color. Unfortunately, this simplistic choice can make certain folders difficult to find in a sea of gray. For this week’s tip, we’ll go through how to change the color that a folder displays in Google Drive.
First, you will need to navigate to the folder whose color you wish to change. Right-clicking on the folder will bring up a menu. About halfway down the menu, you will find the option Change color, with the image of a painter’s palette and an arrow indicating more options. Those options will be the 24 colors the folder icon can display as.
Once you’ve decided on a color to use for that particular folder, click on it. The change will be made immediately, so you will know right away if your choice of color will work for the folder you have edited.
Unfortunately, this feature doesn’t extend to the contents of these folders. Therefore, your Google Docs and Sheets will have to remain blue and green, respectively.
Keep in mind, you will be the only one that sees these color changes. This feature is more of a means for individual users to customize their own experience with Google Drive. Therefore, describing something as “the red folder” will likely mean something very different for someone else as it does for you.
Will you have a particular system for color-coding your folders? Let us know in the comments, and make sure to subscribe to Catalyst Technology Group’s blog for more handy tips!
Tip of the Week: Google Calendar Has Gotten An Update
![]()
Have you checked your Google Calendar recently? Google has given the app quite the polish, both visually and functionally–particularly for those who use its business-grade G Suite for maximum productivity. How will you use this revamped version of Google Calendar for your organization? Let’s find out!
If you take a look at the web application by going to http://calendar.google.com, you might notice that it looks a little familiar. That’s right–it took a page out of its mobile app’s book and looks quite similar to it now. You’ll first notice the color palette, which is quite pleasing to the eye, as well as the slick responsive look which adjusts itself to the size of your browser window.
The actual functionality of it, though, is what businesses will find most useful about the new Google Calendar. Your calendar can now tell you specific details about the rooms in which any events are taking place, including audio equipment, the room name, the location, and other accommodations. This works when both confirming appointments or meetings so that you’ll have the technology at your disposal to make the most effective presentation, but it’s also effective for helping your employees schedule meetings in advance, as all of the information about each of the meeting spaces can be seen at a glance.
Furthermore, all of the contact information for each of the attendants can be seen simply by hovering over their names in Google Calendar. These calendar invites can also be customized with rich text formatting and hyperlinks, allowing for more dynamic event invitations than ever before.
Perhaps the most interesting new feature offered by the updated Google Calendar is the ability to manage multiple calendars. Imagine being able to take a look at each of your employees’ schedules side-by-side. This type of convenience is an incredible way to take advantage of a familiar application. In particular, it’s great for administration, as they may be responsible for delegating responsibilities and scheduling tasks.
G Suite administrators can implement all of these changes, but if you need a hand with it, Catalyst Technology Group is happy to help. To learn more, reach out to us at (317) 705-0333.
Tip of the Week: Change Your Default Browser’s Download Folder
Windows has a dedicated folder to hold downloaded content, appropriately called the Downloads folder. However, you may not want to save your downloads there. You can change the default location of any downloads you make from the Internet, and it’s surprisingly easy. We’ll walk you through how to do it.
But first, why make this change? Let’s say that you’re downloading a particularly large file and you don’t have the space for it on your current hard drive. You might want to tell the download to go to an externally connected hard drive, or even a network drive specifically for things like this. It’s one way to make things much more convenient.
We’ll start with Google Chrome, Microsoft Edge, and Mozilla Firefox.
For Google Chrome
First, you’ll want to open up your Chrome browser and click on the three-dot icon in the top-right corner of the screen. Next, click on Settings. At the bottom of the Settings page, scroll down and click on the Advanced option. Eventually, you will see the Downloads heading. You’ll be able to change the default location for your downloads, and even toggle the option to ask for a new location when you start a download so that you can make sure that it’s going to the right location.
For Microsoft Edge
The process is similar in Microsoft Edge–just click on the three-dot menu and select Settings. A new menu will open on the right side of the screen. From here, select View Advanced Settings. From here, click the Downloads section, and you’ll be able to select the same settings that Chrome would have offered.
For Mozilla Firefox
For Firefox, click on the three-line menu in the top-right corner. Next, select Preferences and navigate to the General tab. Next, select the Choose button next to Save files to. You’ll see the same options that are used for the other browsers.
For more great tips and tricks, subscribe to our blog.
Tip of the Week: How to Print Directly From Your Android Device
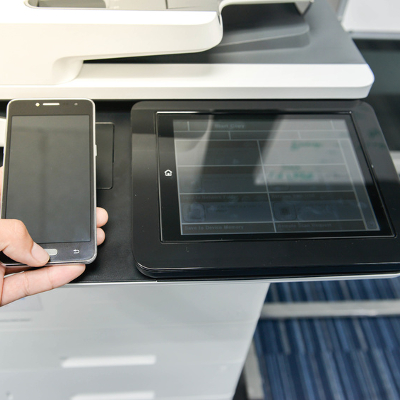
Have you ever tried to print something from your smartphone? Yes, we know that sounds kind of absurd–but it’s certainly not impossible. In fact, it’s often easier to do this than sending yourself an email with the attachment, or accessing the files on your desktop. We’ll go over how you can print a document or picture from your Android smartphone so that you can make things just a little bit simpler.
First, take a moment to think about how often you use your smartphone to access important documents via a cloud connection. Why waste time to print something out when you can accomplish largely the same feat just by connecting your device to your printer via Google’s Cloud Print?
First, you’ll want to check to see if your printer is Cloud Ready. You can use this web page to search for the product number to find out if it is or not. If it’s Cloud Ready, you can then access the wireless setup for your device in your printer’s software, which should be available on a connected desktop. Just make sure that it’s connected to your wireless network.
Depending on the brand and manufacturer of your printer, you may need to visit their website for instructions on how to set it up for Google Cloud Print. Otherwise, you should see your device in your web browser by typing chrome://devices into the search bar. If your device appears under New Devices, click on Manage. You’ll then be able to Register it. When you return to chrome://devices, you’ll see your printer located in the My Devices section, and you’ll be able to select it as a Print destination.
This next step involves downloading the Cloud Print app on your smartphone, which acts as an add-on to services like Google Docs, Gallery, and other apps on your phone. Once you’ve downloaded it, just navigate through Settings > Printing > Cloud Print.
The next time you find yourself in need of a quick print job, just check the settings of the app you’re working in. It will generally be accessed through the three-dot menu in the top-right corner. One of the options should display Print or Cloud Print. Afterwards, it’s only a matter of choosing which device you want to use.
Does your business need a hand with printing documents and other mobile-related issues? Reach out to Catalyst Technology Group at (317) 705-0333.
Tip of the Week: Know Exactly How Far It Is from Point A To Point B With Google Maps

Who needs a GPS device when you have all that you need, right in your pocket? We’re talking, of course, about your smartphone. Whether you have an Android device or an iPhone, Google Maps can make for a great alternative, and it sure beats trying to use an atlas. You can use Google Maps to chart the distance between any target destinations and your current location. You can even use it to get the total distance for an upcoming vacation.
Before you get started, take a moment to make sure that you have the latest version of your Google Maps app for multiple platforms, including iOS or Android. You can find it on the Play store or iTunes.
You can start by opening the Google Maps app and navigating to the place you want to measure distance to. All you do is drop a pin on the location by tapping it. You can then proceed to expand the menu at the bottom of the screen and tap Measure distance. The location will appear in a set of crosshairs on the map.
The next step is to add another point near your location. You can just use whatever bend in the road is closest to your current location. The app will then calculate the distance between your points after you place each one. Once you’ve accomplished this, just select Measure Distance.
One notable thing to keep in mind is that the app can only tell you the distance between your desired location and your current location if you took a direct route there. It’s likely that there will be lots of complications if you drove your car there in a straight line. To tell the driving distance from one location to the next, you must place points all along the streets you’ll use to get to your location. This lets you calculate the exact distance you’ll be travelling.
If you like these tips and tricks, share these blogs on your social media accounts!
Tip of the Week: Your Desktop Needs Some TLC, Too

Does your business struggle with maintaining its Windows workstations? If you do, we fully understand any frustrations you might have. It can be challenging and time-consuming to keep your technology in proper working order, but it doesn’t have to be. With a couple of proactive tips to help you better manage your computers, you’ll be able to waste less time and stay productive during your workday.
Make Sure Your Devices Are Up-to-Date
Microsoft releases updates periodically to make sure that any issues with performance are addressed. You should implement these updates as they are released so that your devices are always working as intended by the developers. To check your device for possible updates that you may have missed, you can hit the Windows key and go to Settings > Update & Security > Windows Update > Check for Updates. If you are all up to date, the page will tell you so. If not, it will give you the option to install any updates that you may have missed. Once you’ve finished this, just restart your computer and complete the installation process. Hopefully, your device will be working a bit better.
Try Restarting Your Device
Even something as simple as restarting your computer can be a great way to improve its performance. The reason for this is quite simple; it shuts down any ongoing processes and allows it to recover. Think about it like trying to work for too long without taking a short break. If you work yourself into the ground, you won’t be good for much of anything, and you run the risk of experiencing difficulties during your ordinary work hours. The same can be said for your PC. Restart it once in a while to give it a breather. To restart your PC, just click on the Start menu or press the Windows key, then navigate to the Power selection and select Restart.
Disable Unnecessary Startup Apps
You might notice that some programs will start right up when you turn your computer on. You might see Spotify open up, or Microsoft Office 365 automatically log you in. Either way, if you find that your computer is taking a bit too long to start up, you can disable certain applications so that they don’t run on startup. First, you want to open your task manager by pressing Ctrl+Alt+Delete. In the More Details section, select Startup. You can then proceed to Disable programs that you don’t need to initiate on startup. Keep in mind that some of these are supposed to be turned on, though, so be sure to reach out to your trusted IT technicians with any help needed concerning startup applications.
By following these three tips, you’ll be sure to experience an improvement in the way your technology runs. If these didn’t help your computer’s situation, and you still need help, remember that you’re never alone. For more information about how to improve the performance of your business’s computers or workstations, reach out to us at (317) 705-0333.